The last graphics project of this semester was ambient occlusion (AO). This is a really subtle effect that mimics the shadowing you would see when something has a lot of folds/creases/occluding geometry on the surface of an object.

No shadows, just AO!
For example, here’s a render of the bunny model without AO:
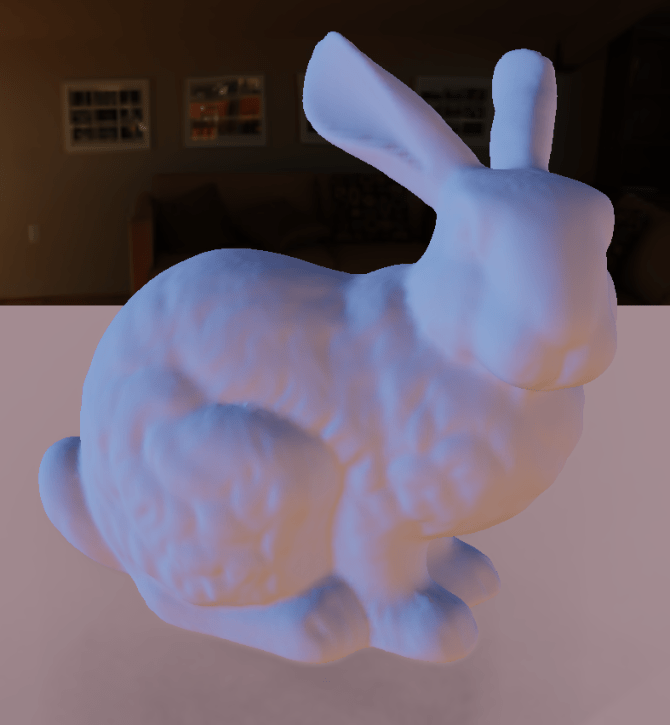
Doesn’t look terrible right? The bunny has nice detailing and nothing seems wrong with it, but compare it to this:
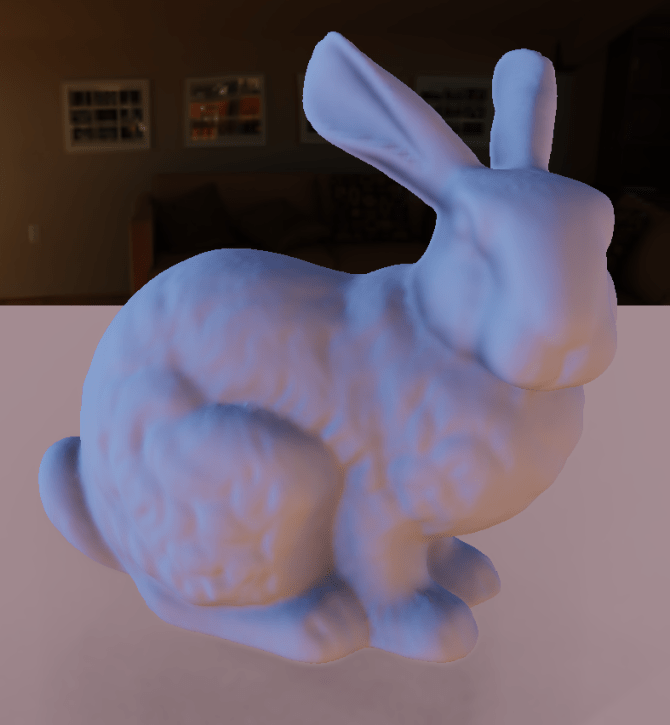
Places to note are the increased shadowing in the folds on the left ear and the crease between the back and front foot. The eye of the bunny has one of the most dramatic changes of all, going from being practically invisible to being well-defined through the shadowing. As a neat comparison, the following image shows the difference between the two prior images:
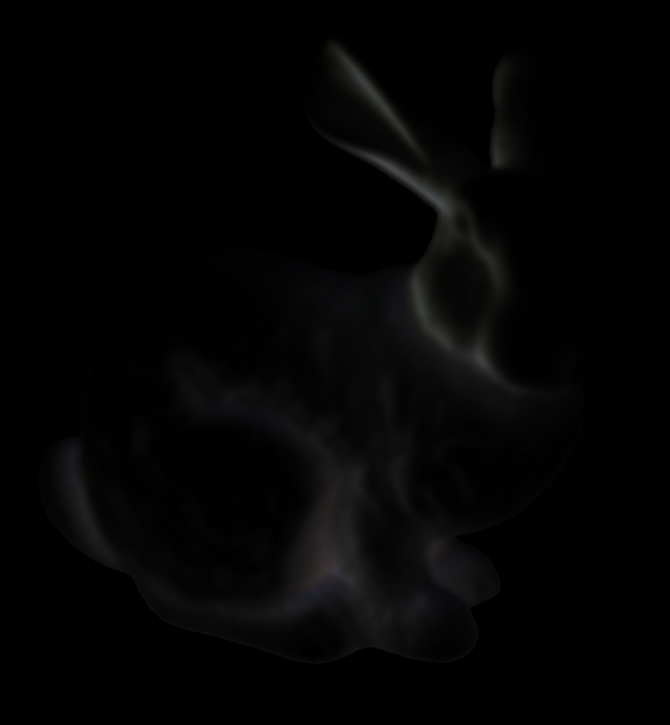
If a pixel is black, it indicates no change between images; everything else indicates a change in pixel color. Even from this alone, we can make out most of the bunny. It’s a really powerful effect that exists in various forms (HBAO, SSAO, etc) in pretty much any modern game.
How it Works
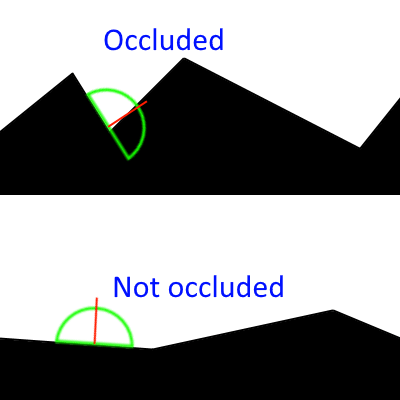
AO is fairly straightforward; given a pixel, we want to determine the amount of occlusion that is affecting the area around that pixel. A picture helps illustrate this:
Now, I implemented screen-space AO. What this means is that we store the depth of each pixel (which 99% of games already do), then we sample this depth map (which exists in screen-space, hence the name). If depth values between two pixels are similar, this means that the two pixels are close to each-other.
Once you determine that two pixels are close to each-other, you need to figure out if the pixels are part of the same surface (normals are aligned) or if they’re part of a valley that should have some occlusion (normals point at each-other).
Now this is expensive to do for every surrounding pixel in the immediate area, so an optimization is that we only perform a small number of checks. Throwing this together, you’ll get an output that looks something like this:
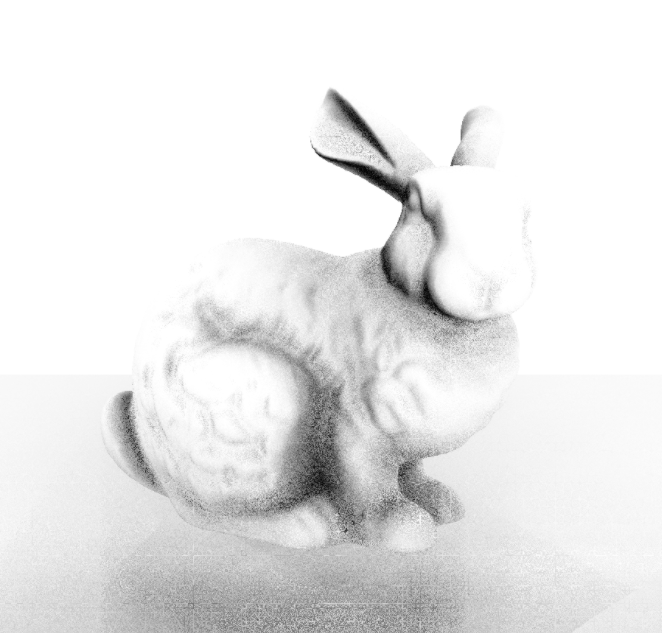
One thing to note is that I didn’t render any geometry here; this is simply calculating how occluded a single pixel is. This definitely gets the point across, but the noisiness is gross. We can avoid this is by applying a blur; this smooths out the noise, and gets us a much cleaner output:
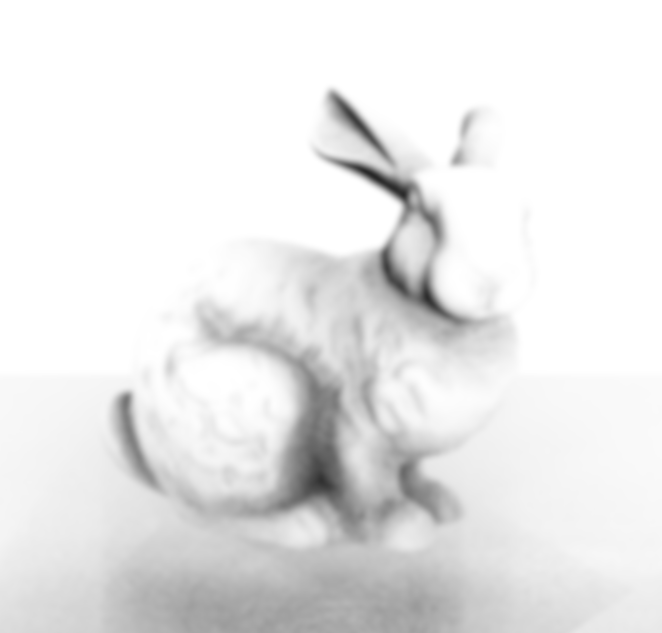
At this point, you simply sample a single pixel during your lighting calculations, and apply it multiplicatively. My AO still has some artifacts; I didn’t have time to implement the edge-aware blur (so the edges are, well, blurry), and the AO pass can have some weird lines sometimes, but it was a good start. I believe these pictures were using 12-13 samples per-pixel while calculating the AO, which explains why AO is so expensive!

Really cool! Though in the second paragraph of the how it works section you talk about the normals of the pixels. Can you explain this concept? Otherwise this is very clear and the pictures help
LikeLiked by 1 person
Thank you! So, the problem with just looking at the depth values is that it only tells you if two pixels are close. Looking at one of the pictures I posted (https://matthewyan.files.wordpress.com/2016/12/occlusion.png), I outline two cases:
Imagine we are checking two pixels inside of the green dome. For the occluded image, the normal of two pixels could be facing each-other (if sampled from opposite sides of that valley), indicating that they would occlude each-other. In the second half, the surface is relatively-flat; the normals indicate that pixels should not occlude each other. Here’s a second image that may explain it more: (http://imgur.com/a/6HI4b).
Does that make sense? I can try to explain it a different way if this is confusing.
LikeLike